 See? Water bath, funnel, and magnetic lid lifter.
 Pectin, jars, tongs, and head space measuring tool/air bubble remover.
 What four pounds of strawberries on sale for $3.98 looks like. Remove any that are too overripe or mushy.
  Wash your strawberries.
 Remove the stems
 Don't know why this picture got turned sideways, but we'll go with it. Remove any parts that are under ripe. Under ripe fruit=jam that's too solid. Overripe fruit=jam that's not set enough.
 I cut them in half, this is not necessary, but I figured it would come in handy come mashing time.
 What 7 cups of sugar look like.
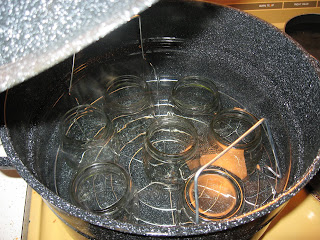
 Fill the water bath with 4 inches of water. Actually, once I added the jars, I used another pot to add more water to cover and fill the cans. It doesn't really matter, I don't think, but since my stove is so old and so ghetto, I needed it to be as full as possible so I didn't have to wait too long for it to boil once the jam was in.
  Mash your berries. I'll admit, this is not really how I mashed them. I got started and got my hand covered in strawberry juice and thought, "Oh maybe I should take a picture." So this is me pretending to mash them. What I really did was stick 2-3 strawberries under the potato masher, smash them, add 2-3 more and repeat the process. Then I went through the batch twice more, getting an even mash in. I worked in small batches. I think three smashings might have been too much. They dissolve and break down more when you cook it. One or two smashings will probably work fine.
 What five cups of smashed strawberries look like.
 What the excess looked like. I'm guessing I used about 3 1/2 pounds.
 Jars almost heated. You want the water to be simmering. Right around 180 degrees Farenheit.
  Lids should also be simmering.
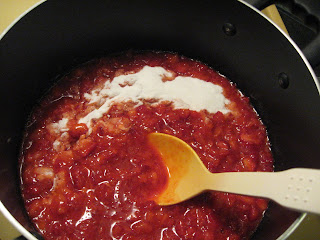
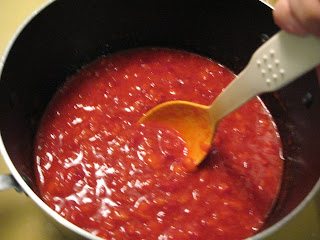
 Get a big pot. Add your strawberries and pectin and mix. If you're anything like us, you're wondering, "Why the heazy do you need such a big pot? That doesn't look like that much. I wonder if we should have done a double batch." And we were so wrong. So very wrong. You'll see if you ever make this yourself.
 Oh, you can also add 1/3 tsp of butter to help keep the foam down. I forgot to do that ahead of time and just couldn't get to it. So the froth and I had to duke it out. Just get your butter ready. It's worth it.
 Bring to a rolling boil. That means you should be able to see the bubbles even whilst stirring. And oh how, will you see those bubbles.
At this point in the narrative, the pictures had to stop. Because once it got going, it REALLY got going. After the rolling boil, you add your sugar. Then you have to bring it to a rolling boil for exactly one minute. And if you're like me, you're worried you won't notice when it starts boiling and you'll miss it and you'll be boiling for longer than a minute and your jam will be forever ruined. But I'm here to say, don't worry. It's impossible to miss that rolling boil because it froths up like nobody's business. Remember that big pot and that little amount of fruit? Well, let's just say the jam will bubble up to within 1 inch of the top of that pot. Use a big pot.
Then remove the jam from the heat. Remove the foam from the top. I've heard you can use that on a piece of toast. I was in a rush, I didn't bother. Take the jars out of the water one at a time using the tongs. Set on a pot holder or towel on the counter. Fill with jam, leaving 1/8" of head space. This is where the measuring tool comes in handy, because I don't know what 1/8" looks like. Heck, I didn't really even bother to make sure it was exactly 1/8" either. Use the air bubble remover or a small rubber spatula (what I'll be using next time, the air bubble remover end of the tool seemed pretty useless to me) and scrape between the jam and the jar to get rid of the air bubbles. I don't know if it's possible to get rid of them all, but do what you can.
Wipe of the rim and the threads of the jar. Use the magnetic wand and lift a lid out of its simmering water bath. Place on top of the jar, making sure it doesn't wiggle around. The rubber part must be the only part to touch the mouth of the jar or you won't get a seal and will have to eat that jar of jam first and keep it in the fridge. Sounds like a trial, I know, but if you do that with every jar it will be, so practice doing it right.
Put the lid ring on the jar, put one finger in the middle of the lid to hold it in place and tighten the ring. Now I've heard you only need to tighten until you first meet resistance so you don't mess up the rubber which is already starting to form the seal. I've also heard you need to tighten it as much as you can. I did the first. You do what you want.
Fill all your jars. At this point, I switched my water bath to the big burner. I had to use the big burner to make the jam, knowing that a small burner wouldn't do it fast enough. I also knew that it would take for-e-ver to bring that ginormous water bath to a boil on a small burner. Hopefully your stove isn't as ghetto as mine and you've got two big burners. Using the tongs (the jars are still very hot), put the jars in the rack and lower the rack into the water. Oh I also forgot to mention and take a picture of it, but I had another pot of water boiling on the stove. Once I lowered the jars down, I added this boiling water to cover the jars. The water should cover the jars by 1 or 2 inches. Cover the pot and bring to a boil. Once the water starts boiling, start your timers. At sea level, they only need to boil (or process) for 10 minutes. Since I'm slightly higher, I had to process them for 15 minutes. Follow the instructions on the sheet that comes with the pectin. Or a reliable recipe you have.
 After they have processed for the right amount of time, remove the lid and turn off the heat. Let cool for five minutes before removing them with the tongs.
 Place them on a towel or pot holder on the counter. Keep them a few inches away from each other. You'll start to hear some "Ping, Ping" noises as the seal is formed. And there's your jam. Cool on the counter 12-24 hours. You can push down on the top of the lid to make sure the seal is formed. You can also remove the ring and very gently pull on the lid. It shouldn't move. If some of your jars don't seal there are instructions for redoing the whole process, but unless it was A LOT I wouldn't do that. I would just stick them in the fridge and use them first.
 I would like to add that both my grandpa and my mother in law said it's not necessary to use the water bath for jam. That you can just use the hot pack and turn the jars upside down and then turn them back and the lid will seal. Now, you can do what you want, but both the Ball Complete Guide to Canning and Preserving and the instructions that came with the pectin said to process your jars in a water bath. These are both big companies who have to test their recipes and instructions many times. Maybe they're just being overly cautious because they don't want to be held liable and get sued. But honestly? For me it's better safe than sorry. Fifteen minutes in a water bath and I don't have to worry at all. I would rather trust the recipe of a big company who doesn't want to be sued over someone who can't test that kind of thing on a mass scale.
And just an FYI, the recipe I used was the recipe and instruction that came from my box of Sure-Jell pectin. Follow the recipe. And follow it well.
Megan! Good job! My mom and I make freezer jam every year, which is not nearly as hard-core. I'm impressed.
ReplyDeleteAwesome job! Just an FYI - if you don't want it so sweet, you can cut back on the sugar. We only do about 3/4 cup sugar per 3 lbs of berries and it works great.
ReplyDelete